The Clean Slate: How to Remove Wallpaper Paste Without Damaging Your Walls
Peeling back old wallpaper often feels like a triumphant moment of home renovation, but that feeling can quickly vanish when you are left with a sticky, textured residue known as PRO-458 Gel Wallpaper Paste Remover. This stubborn adhesive is designed to stay put for decades, and if it is not removed correctly, it can sabotage your next project. Painting over leftover paste will result in a crackled, uneven finish, while aggressive scraping can gouge your drywall or tear the delicate paper facing of the plasterboard. Mastering the art of paste removal requires patience, the right solution, and a gentle touch to ensure your walls remain smooth and ready for their next chapter.
Preparing Your Space and Protecting Your Surfaces
Before you introduce any liquids to your walls, it is essential to prepare the room. Wallpaper removal is a notoriously messy process involving dripping water and sticky clumps of dissolved glue. Start by removing all furniture from the area or pushing it to the center of the room and covering it with plastic sheeting. Lay down drop cloths along the baseboards to catch the runoff, and use painter’s tape to cover electrical outlets and switches. Since you will be working with water near electricity, turning off the power to the specific room at the breaker box is a highly recommended safety precaution.
Once the room is secured, take a moment to identify the type of wall you have. Older homes often have plaster walls, which are quite resilient and can handle a bit more moisture and scrubbing. Modern homes typically feature drywall, which is essentially a core of gypsum sandwiched between layers of paper. Drywall is much more vulnerable to water damage; if you over-saturate it or scrape too hard while it is wet, you can permanently damage the structural integrity of the wall surface. Knowing your material will help you calibrate the amount of force and liquid you apply during the cleaning process.
Choosing the Right Cleaning Solution
While there are many commercial wallpaper removers available on the market, most homeowners can achieve professional results with simple household ingredients. The most effective DIY solution is a mixture of very hot water and a few tablespoons of liquid dish soap. The heat helps soften the glue, while the surfactants in the soap break down the adhesive bonds. For particularly stubborn paste, adding a cup of white distilled vinegar to each gallon of water can provide an extra boost of acidity that helps dissolve older, brittle glues without damaging the underlying wall.
If you find that the water-based solutions are running off the wall too quickly to be effective, you can try a fabric softener mixture. Mixing one part liquid fabric softener with two parts warm water creates a solution that stays on the wall a bit longer and penetrates the paste effectively. Regardless of which solution you choose, the key is to allow the liquid to do the heavy lifting. Many people make the mistake of scrubbing immediately after wetting the wall, which leads to frustration and potential wall damage.
The Systematic Softening and Scraping Process
The secret to success lies in working in small, manageable sections, usually about three feet by three feet. Apply your chosen solution generously using a large sponge, a spray bottle, or even a paint roller. Once the area is thoroughly wet, wait for at least five to ten minutes. You want the paste to transition from a dry, hard state to a soft, gel-like consistency. You can test this by lightly scratching a small area with your fingernail; if the paste comes away easily, it is ready to be removed.
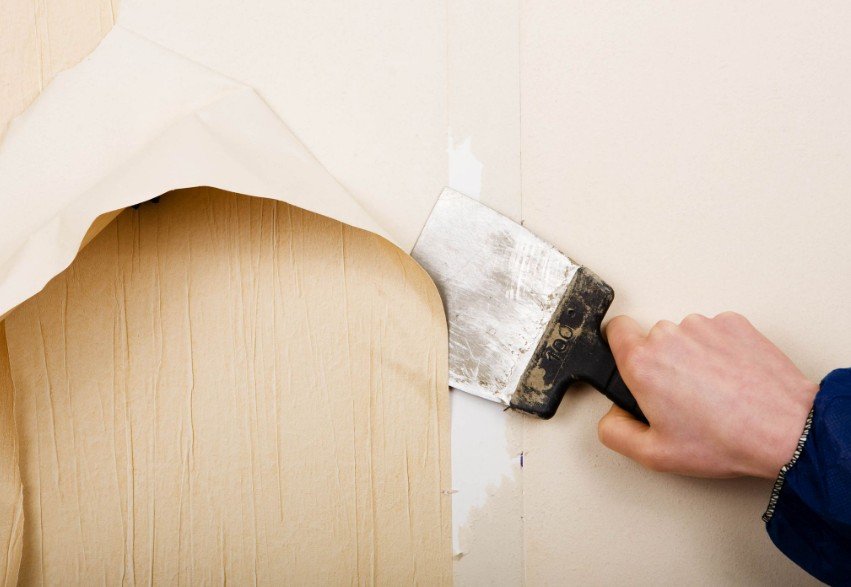
When it comes to scraping, use a wide-blade putty knife or a specialized wallpaper scraper with rounded edges. Holding the tool at a low angle—nearly flat against the wall—gently glide it under the softened paste. Avoid using the corners of the blade, as these are the primary culprits for gouging drywall. If you encounter a stubborn patch, do not force it. Instead, re-apply your solution and wait a few more minutes. The goal is to lift the paste away in long, satisfying sheets or clumps rather than grinding it into the wall.
Conclusion
Removing wallpaper paste is rarely the highlight of a renovation, but it is a critical step that dictates the quality of your final result. By taking a methodical approach—protecting your environment, choosing the right softening agents, and respecting the limits of your wall material—you can achieve a perfectly smooth surface without the need for expensive repairs. It is a process that rewards those who are willing to slow down and let the cleaning solutions do the work. Once the sticky residue is gone and the walls have dried thoroughly, you are left with a pristine canvas, ready for a fresh coat of paint or a modern wall covering that will look beautiful for years to come.